我们都知道浏览器默认的,alert弹窗,radio单选框,复选框checkbox,下拉框select样式实在是十分丑陋,很多UI框架都进行了重写,多数朋友并不理解是如何实现的,今天通过下面的一个小例子或许能打开你的思路之门。
系统自带的组件样式并没有给我们提供方法修改,所以实现的方法只能是自己重写来模拟其功能。
先把html的结构放出来,看下面代码应该就明白我的意思了
html代码:
<div class="box">
  <div class="select_box">
  	<font>?</font>
	<span>选项一</span>
    <ul>
      <li>选项一</li>
      <li>选项二</li>
      <li>选项三</li>
    </ul>
  </div>
</div>
看上面的结构可以看出,里面并没有见到所谓的select、option下拉组件标签,而是用我们常见的类似二级导航的方式来模拟其显示,我们给上面的代码加上适当的css代码就可以达到自定义美化下拉框的效果。
css代码:
*{margin:0;padding:0;font-family:"微软雅黑";font-size:16px;}
ul {
	list-style:none;
}
.select_box {
	width:200px;
	height:36px;
	border:1px solid #3CF;
	position:relative;
	float:left;
	margin-right:50px;
}
.select_box span {
	display:inline-block;
	width:200px;
	height:36px;
	line-height:36px;
	cursor:pointer;
	text-indent:10px;
}
.select_box .title_on {
	color:#C36;
}
.select_box ul {
	width:200px;
	position:absolute;
	top:36px;
	left:-1px;
	border:1px solid #3CF;
	display:none;
	background:#fff;
}
.select_box li {
	cursor:pointer;
	line-height:36px;
	text-indent:10px;
}
.select_box li:hover {
	background:#39F;
	color:#fff;
}
.select_box font {
	position:absolute;
	right:10px;
	color:#3CF;
	font-size:26px;
	transform:rotate(90deg);
}
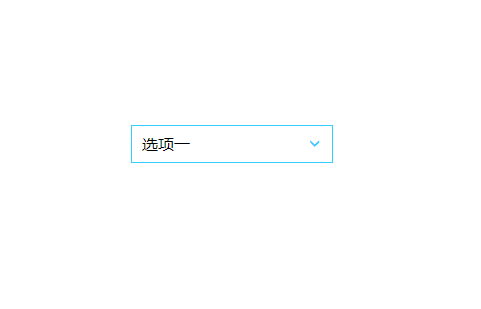
这样我们就得到了如下图所示的风格

有了大概的样子我们就可以书写相应的JS代码
步骤如下,首先点击选择框需要显示UL下拉,然后点击下拉要把相应的值填入选择框中
因此我们需要两个点击事件
点击选择框:
var selectTitle=$(".select_box span");

selectTitle.click(function(e){
	$(this).addClass("title_on");
	$(this).next("ul").show();
});
这个不难理解点击显示下拉框,并给选择框添加一个title_on样式类
点击下拉框内容:
var selectItem=$(".select_box li");

selectItem.click(function(){
	var selectText=$(this).html();
	var selectTitle_2=$(this).parent('ul').prev("span");
	selectTitle_2.html(selectText).removeClass("title_on");
	$(this).parent('ul').hide();
});
上面的代码先获取了下拉框中点击的内容,然后填充到选择框中并且移除title_on样式类,然后隐藏下拉框
附上完整的代码:
<!doctype html>
<html>
<head>
<meta charset="utf-8">
<title>手把手教你如何自定义select下拉框</title>
<script src="https://cdn.bootcss.com/jquery/1.12.4/jquery.js"></script>
<style>
*{margin:0;padding:0;font-family:"微软雅黑";font-size:16px;}
ul {
	list-style:none;
}
.select_box {
	width:200px;
	height:36px;
	border:1px solid #3CF;
	position:relative;
	float:left;
	margin-right:50px;
}
.select_box span {
	display:inline-block;
	width:200px;
	height:36px;
	line-height:36px;
	cursor:pointer;
	text-indent:10px;
}
.select_box .title_on {
	color:#C36;
}
.select_box ul {
	width:200px;
	position:absolute;
	top:36px;
	left:-1px;
	border:1px solid #3CF;
	display:none;
	background:#fff;
}
.select_box li {
	cursor:pointer;
	line-height:36px;
	text-indent:10px;
}
.select_box li:hover {
	background:#39F;
	color:#fff;
}
.select_box font {
	position:absolute;
	right:10px;
	color:#3CF;
	font-size:26px;
	transform:rotate(90deg);
}
</style>
</head>
<body>
<div class="box">
  <div class="select_box">
  	<font>?</font>
	<span>选项一</span>
    <ul>
      <li>选项一</li>
      <li>选项二</li>
      <li>选项三</li>
    </ul>
  </div>
</div>
<script>
$(function(){
	var selectTitle=$(".select_box span");
	var selectItem=$(".select_box li");

	selectTitle.click(function(e){
		$(this).addClass("title_on");
		$(this).next("ul").show();
	});

	selectItem.click(function(){
		var selectText=$(this).html();
		var selectTitle_2=$(this).parent('ul').prev("span");
		selectTitle_2.html(selectText).removeClass("title_on");
		$(this).parent('ul').hide();
	});
});
</script>

</body>
</html>
相信看完此文,大家对其他的默认组件如alert的样式,会有一个全新的思路去处理了^_^
本文由站长资源原创首发,转载请注明出处
评论前必须登录!
注册